
Discussions of brewing with low oxygen have returned to the home brewing world with some controversy. I will be using LO2 as a short cut to describe what has been termed LoDO or low oxygen brewing. If you follow this blog, you are aware that I have been exploring low oxygen for some time, starting with a reboot of my brewing procedures, chasing a very low malt astringency that was appearing in my lighter beers, especially in lagers. If you are interested in exploring low oxygen brewing, I suggest looking here: Germanbrewing.net, Lowoxygenbrewing.com, “Technology Brewing and Malting” by Kunze, and the paper PDF, “Brewing Bavarian Helles, V 2.0“.
Low oxygen brewing’s premise is hot side oxidation (HSO) occurs quickly when free dissolved oxygen interact with volatile and delicate malt phenols, both darkening the wort and driving off much of the fresh malt flavors. The LO2 process focuses on all phases of brewing, dramatically limiting dissolved oxygen (DO) in liquor and wort from aeration and atmospheric exposure. LO2 seems to particularly shine in German-styled lagers, and in any instance where fresh and delicate malt flavors are important.
There are a lot of extreme complaints and reaction against this technique, so I feel it necessary to state the following: If you think LODO/LO2 is the devil, fine, move along. I feel I am upping my lager game, based on system measurements, competition scores and feedback, which can easily be explained by personal confirmation bias – I can own that. The outstanding question is if my brewing has improved because of these techniques or the additional attention to detail.
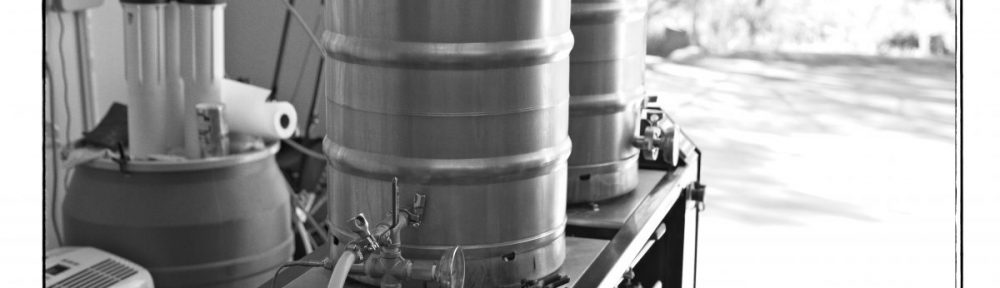
Let’s get into the detailed process and techniques, specific to the Sabco Brew-Magic V350MS (2011) system. The V350MS is a turnkey 3 vessel hybrid RIMS system, featuring direct fired kettles, integrated RIMS tube, pump, and hard plumbing. At the center of the experience is a small integrated computer that helps the brewer manage timing and temperature, and produce consistent results. Yes, I love my Brew-Magic. That said, I have made numerous changes to it over the years. Many of these topics should apply to other systems, such as HERMS or RIMS.
Measurements with my DO meter (Extech DP600) confirmed I needed to go beyond Sabco’s recommended practices to dramatically reduce DO uptake. LO2 requires reducing DO before graining in by pre-boiling and using O2 scavengers (such as sodium meta-bisulfite (SMB), ascorbic acid (AA)) to deal with oxygen absorption during the grain-in and mashing processes.
Iterative measurements throughout the brewing process revealed that I needed to go all the way through the system and tighten up areas where micro-aeration and turbulence in the pipes, pump, and RIMS tube might occur. Of particular interest, learning to gently underlet the mash during grain in and circulation of the wort during mash, are important to reduce DO uptake. There are some places in the plumbing where air bubbles can gather.

The Big Black Control Box
This area contains the computer and electronics, the RIMS tube, and the pump. On my system, it was clear that I needed to replace the tri-clover gasket on the RIMS tube, and tighten down the clamp to ensure an airtight connection. I also took the opportunity to inspect the heating coil, which was clean as a whistle. A little crud had built up around the gaskets – so that got a solid cleaning.

I also tightened down the hose clamps, after inspecting the braided hoses. As the system is coming up on its 6th birthday, it was past time for a deep maintenance, a few of those clamps took 2-3 easy turns before tightened. The box took me about 45 minutes and something I now recommend on an annual basis.

The Pipes
The V350 is hard plumbed to each of the kettles, including the return port to mash tun. Without taking this completely apart, which I considered and decided against, I simply tightened up all of the connections and valves. As a purely cosmetic addition, I installed a vertical site glass on the MLT return line, as well as adding a ball valve that I now use for finer flow control (leaving the flow valve under the HLT completely open).
The site glass and valve also allows me to fully prime the pump and piping, holding the full volume on that return pipe before grain in (fewer bubbles when the pump is engaged). All of the tri-clover gaskets were replaced with new BUNA gaskets, discarding those that had deformed over time from sheer force and wear.

I also took the time to gently bend some of the thinner steel plumbing to relieve the sheer forces and weight that seemed to be deforming the TC gaskets. This should be done very carefully to not crimp the tubes, and fortunately only needed a slight adjustment. You should slightly loosen the frame clamps when doing this, and retighten when you are happy with the position, with the kettles connected.

I evaluated the compression fitting for the thermocouple and determined that it was airtight, but I still cleaned that section out with a pipe cleaner. Malt and gelatinized starch can build up here and create issues with reading temperatures.

The Kettles
As mentioned, all of the internal TC gaskets were replaced on the dip tubes with new BUNA gaskets, and I took care to properly tighten down the clamps. I needed to deal with the return inlet on the MLT, where I had previously been friction fitting some loc-line tubing. This was replaced with a proper compression coupler, and allows a tight MPT fitting to the loc-line. A little PTFE tape and the seal is secure.

For the run off from the MLT, I installed a long silicon hose that reaches to the bottom of the boil kettle. This allows me to transfer with minimal aeration, and eliminate air from backing up into the hose and floating the mash. I no longer use the long stainless steel tube on the system, however, one could simply extend that tube with a small length of silicon tubing and a stainless hose clamp.

The (formerly) Chill Wizard
I have heavily modified my Chill Wizard beyond recognition. My tap water is so very hard it plugged up the cold side of the plate chiller after a year’s usage, so I replaced it with a CFC. Once again, I replaced gaskets and tightened things up. I now have a three-way valve to allow me to pump over to a whirlpool arm in the boil kettle, so that portion needed to be tightened up. Again, paying attention to prevent any aeration and testing with gentle flow rates. Same for the connection to the CFC. I am rebuilding this whole system as I write this, hence no photos. I have no issues with the way the Chill Wizard functioned when I was using whole hops and the false bottom.
Testing for Mechanical Aeration
Finally, I ran a deep clean of the system with hot PBW and a cold water rinse. I then ran 10 gallons of a strong StarSan + RO water solution, paying special attention to foam creation, the idea being that aeration equals foam generation.
This was gravity fed to prime all of the hard plumbing, and then gently pumped over with the loc-line in the MLT bent to fill from the bottom. I ran this first at a very slow speed, and then cranked it up to full. There should be minimal foam generation after all of the air is evacuated from plumbing, even with a full circulation speed. I then moved the loc-line into a typical position for mash circulation, with outlet just below the solution level. Then pumped for another few minutes looking at the speed of circulation and correlating foam creation with potential aeration. Goal: transfer and circulate the Star San solution without generating a lot of foam. Some foam will form from friction in the kettle with a strong circulation.
This solution was gently transferred to the boil kettle, and whirlpooled. I learned that, again, I needed to fully fill the pump lines to minimize air that would bubble up when the pump was started. I also learned that I needed to throttle the whirlpool speed to prevent aeration. After this – I transferred the sanitation solution to one of my conical fermenters, watching carefully with the lid open for any build up of foam that might indicate aeration. By filling the knock-out hose completely before connecting the TC to the bottom port on the fermenter, minimal bubbles formed, even with the pump fully open. Goal: “lauter” and whirlpool and knock out without generating a lot of foam.
That satisfied my curiosity, and when I compared my next brew day’s DO readings, they improved, from about 6-7 ppm DO down to about 2.5 ppm DO coming out into the boil kettle. Not perfect, but significant improvement. With this data in mind, I can tailor my scavenger additions more accurately. I use a spreadsheet that I shared at the German Brewing Forum: Dosage Calculator.
Careful Brewing Techniques
The LO2 paradigm requires that strike and sparge water is de-oxygenated before it touches malt. I have experimented with a 10-minute pre-boil in the HLT, using a stainless immersion chiller to bring the liquor back to strike temps, and deployment of sodium meta-bisulfite (SMB). This works well, and with the tight system, I can use under 45 ppm SMB to scavenge DO during the grain-in and mashing procedures. I plan to experiment with the use of a little sugar and yeast, which can be more effective and possibly eliminate the pre-boil step.
Some scavenging chemistry is necessary to achieve the proposed 1 ppm DO upper limit in the mash, measured with a DO meter. I use reverse osmosis liquor. Adding a little SMB, ascorbic acid (AA), and hydrolyzed gallotannin (Brew-Tan B (BB)) are now part of my usual water chemistry regiment, along with style specific mineral additions. I am experimenting with natural lactic acid in the form of sauergut to manage mash pH, along with a little acidulated malt, to hit a proper mash pH.

Grain-in to Mash
Once my water has been de-oxygenated and cooled to 5-6 degrees over strike temps, I then start my grain-in process. I will gravity feed liquor through the plumbing to the level of the false bottom, close the valve below the MLT, and pump over just enough to fill the return plumbing and close the site glass valve. Pumps and plumbing are now primed and warming up. I then mill my malt, which has been conditioned (using a spray bottle to lightly wet the husk material). I transition the loc-line to feed directly into the level of the false bottom, add the grains, and then very gently pump over the liquor. This bottom filling technique allows the grains to release any trapped air, floats a good deal of the flour and prevents some of it getting into the plumbing while minimizing dough ball creation. I no longer whisk the mash to bust dough balls, now just very gently stir with my mash paddle. I then reposition the loc-line return to outlet at least an inch below the mash water level. This sits for 5-10 minutes, allowing the malt to hydrate, under the lid. Meanwhile, the scavengers (SMB, AA) are quickly reducing any oxygen pick up.

I am building a floating mash cap, with the loc-line return below the cap. By greatly reducing the exposed surface area to the atmosphere, I should be able to further reduce the use of DO scavengers. I have purchased a 12” cake pan that should allow me to put an appropriate manifold in the center, and float during mash circulation. This, combined with a lid on the mash, should further reduce DO uptake during the mash.
The Mash
After this short rest, I start the mash period (using the computer), and begin a very slow and gentle circulation, adjusting the direct fire as required, and don’t exceed more than a half flow rate until the mash has stabilized, usually taking 10-15 minutes. You may want to compensate for this time in the computer recipe builder; I don’t. The MagicSoft software will start the timer when the temperature is hit, but the entire mash temperature may not yet be homogenous, especially if you are pumping too quickly. The half-speed flow circulation should help prevent the mash from sticking. Once I am comfortable the mash is at even temperature, I then slowly increase the flow rate, watching the site glass. Generally, I am at full flow within 10-15 minutes.
If I am step mashing (which I usually do), then I follow much the same procedures. Slow the flow during the ramp and use a minimal fire under the kettle, overshoot by a degree or two, then return to full speed. The only risk here is that the wort in the RIMS tube MAY become hotter and potentially denature enzymes, especially with a thinner mash. I haven’t seen this, but creeping up to temperature gives me more consistent results than ramping more quickly. I believe the convection heating from the direct fire works better with the slower pump rate. Of course, this takes some time for a big step (such as 144/160/170). I nearly always mash out – more out of habit than anything which seems to improve lauter efficiency.

The Lauter
Once mash out is complete, I shut ALL of the flow valves down, sealing out any air intake into the plumbing, and then start to flow the wort into the boil kettle. I gather enough wort to fully cover the hose that is resting on the bottom of the kettle, ensuring that no air bubbles gather at the valve. I then adjust the boil kettle output flow to a very slow rate, open the HLT up fully and crack the MLT return valve (remember I added one at the site glass). I then start the pump. The valve below the MLT (the one that pulls from the MLT dip tube) is now fully closed for the duration.
Unfortunately, I need to open the lid to balance the sparge liquor level. The finer flow control using the inlet ball valve really helps to create a slow flow with even balance. I am experienced enough now that this only takes a few minutes to get right. It helps to use the ridges in the converted sanke to reference the level to maintain. Using loc-line, I can also use the level of the inlet as a reference. Try to keep the lid on as much as possible throughout this process, and do so gently. Once I have roughly half of my pre-boil collection, I light the boil kettle fire. After the lauter is complete, I close the valve and carefully remove the hose.
The Boil
The boil proceeds more or less normally. I do feather back the gas on the boil kettle to a strong simmer after first break to reduce the thermal load and stress on the wort. Most of my German-styled beers use first wort hops (FWH), and I now skim the brown scum (schaum) that floats during the boil. This also seems to help reduce boil over and foaming. As you can see from the previous photo – I no longer use the false bottom in the boil kettle – preferring a double ring false bottom stand from NorCal Brewing. I loosely bag hops in 5 gallon paint strainers to keep the bulk hop matter away from the bottom of the kettle. I have not noticed any reduction in bitterness or hop flavors and aromas, and the large bag allows the hops to move around with the convection in the boil.
I use the boil period to muck out the spent mash, and rinse out the system. A wet dry vacuum makes this very easy, even with a hot mash. While mucking out – I am filling the HLT with cold water. I put a bucket under the bottom outlet under the box, and open all of the valves (except the HLT) to drain out the residual wort. Once emptied, I set up to pump over and circulate cold rinse water through the system. I disassemble the MLT dip tube and false bottom, as well as start to heat this water. There is usually a tiny bit of remaining wort in the water from the circulation, but I go ahead and add PBW, heat this up to 135F and let circulate until the boil completes.

The Knock Out
I now use both a stainless immersion chiller, as well as the CFC. Using my typically very warm tap water, I can drop the boil to 90F in about 15 minutes. I run the whirlpool very slowly during this process so that the wort is moving gently past the coils. Once I get to this point, I can quickly knock out to the fermenter, pumping ice water through the CFC. This gets me pretty close to pitching temps. I have been experimenting with dropping the wort close to freezing, and pulling cold break. The break pull also serves as my final gravity sample, and wort for a Fast Fermentation Test (FFT). I then return the fermentation freezer to pitching temperatures – pitch an appropriate amount of fresh and active yeast and aerate between 6-8 ppm DO.
Once fermentation reaches about 5 points above my final gravity from the FFT, I transfer into fully purged corney kegs (completely fill a keg with StarSan or SaniClean and push out with CO2). I push the beer out of my conicals with a low pressure regulator (1-2 PSI of CO2), and fully fill the corny keg. These then go into conditioning and finally lagering. The residual yeast from conditioning keep the DO levels extremely low, and the natural carbonation gets me very close to desired carbonation levels out of the gate. Without using kettle or fermenter finings, I am seeing very clear beer between 4-5 weeks of lagering (at 32F).
Conclusion
While this was a very long, detailed overview, at this point, so much is just worked into my “normal” process that it’s, well, normal. The only real imposition is the additional time to pre-boil the strike and sparge liquor, and the longer fermentation/condition/lagering times before tapping the keg. The additional costs of the BUNA gaskets was nominal. I have spent money on the DO meter (about $250), some spunding valves ($40 each) and other bits, like kitting out a mash cap.
I have seen many of the sensory effects mentioned in the Helles paper; no malt aroma during mashing, dramatically paler wort production, and surprisingly fresh malt and cereal aromas and flavors in the wort and finished lagers. Hops stand out as well, apparently cleaner and more intense. I have promised some triangle testing, and that is coming soon now that I feel that the bugs have been worked out of my system and techniques.
Prost!


Nice write up, thanks. I have been reading a lot about LODO over the past few days, and am going to give it a shot myself soon. My system is actually fairly well equipped for it already, so my first attempt will just be pre-boil/underlet/mash additions. I have (or will soon have) SMB, BTB and AA. I have read a lot about the “trifecta” but I haven’t been able to find AA suggested quantities. Can you help me out? Also, when using the “trifecta”, do I just use the full recommended amounts of SMB and BTB? I am brewing ales, so will keep the SMB <50 in any case.
Thanks for the nice words. I have been calculating the SMB at 50 ppm, and replacing half the amount with AA. Commercial products like Antiox C have a slightly different ratio.
It’s not a paper, it’s a pdf.
point taken
From noted commenter `sdlkfjsadkfjlsdkfj`
Hah, yeah.