
Racking and finishing your mead can be complicated, but is simple if you can put together a plan.
In Mead, Part 2, I laid out a simple mead recipe and gave instructions and recommendations for making and fermenting your must. Let’s recap.
- Hopefully, you have had the chance to sample some really great commercial and home-brewed meads.
- You bought quality honey and made your must.
- You fermented with temperature controls, degassed regularly through the first 5-7 days, and deployed a staggered nutrient addition schedule (SNA or TOSNA).
- Your mead’s final gravity should be nearing 1.005 or lower. There is a thick sludge at the bottom of the fermenter (the gross lees).
- AND you have been tasting samples of the fermenting mead along the way and taking notes.

Racking Technique
Racking mead is carried out much the same way as racking beer, especially if you are brewing in buckets. As always, everything should be absolutely clean and sanitized. This includes a carboy (I prefer glass for mead because of low DO permeability, and use a padded and bag lined crate as a safely measure), a racking cane or auto-siphon, and any hoses. A spray bottle of StarSan or SaniClean is handy for this process.
It is also important to remember that the outside of your fermenter (or at least mine) gathers some dust and possibly some drops of must or honey along the way. Remove the lid carefully. I use a plastic lid opener which makes short work of a tight fit. I immediately move the lid away to clean and sanitize, along with my hands. If I need to walk away for any extended period of time, I will put the lid loosely over the mead.
Let the mead settle in the fermenter after any bumps or movement. The goal is to leave behind as much of the lees as possible. I like to move my fermenter into place the evening before, remove the lid, and replace it after cleaning.
Ready to Rack?
Your mead should be finished or at the sweetness level that you prefer. Racking can be used as a strategy to stop fermentation early, and is particularly effective when used with sulfites and sorbates. I prefer to let the mead finish completely, usually off-dry, and back sweeten with a sweet mead. Raw honey can be used, but lends a raw flavor that many mead judges find to be a flaw.

For racking out of a bucket, I prefer my auto-siphon with silicon tubing. Silicon fits easier onto the siphon and seals better than vinyl. I can also boil or pressure cook the silicon to sterilize when needed! Before I start to rack, I will add a small amount of K-Meta (~1/4 tsp Potassium Metabisulfite for 5 gallons) into the carboy based on the volume of mead. You can skip this step, but it is insurance with fruited or spiced meads to reduce oxidation during handling. It will dissolve into the mead during transfer.
Gently start the auto-siphon, watching where the tubing fits to the cane and make sure no bubbles are forming. Tip the hose up at top of the auto-siphon to allow any air to evacuate. I will then let the siphon lean against the front edge with the end resting just above the lees. Since this is the first racking, a tiny bit of lees shouldn’t be an issue.
As the fermenter empties, gently tip the fermenter to ensure the end of the siphon remains covered. When you start to see cloudy transfers, stop the flow. With silicon hose, I can easily pinch off the flow, release the siphon and minimize any lees/cloudy mead coming through.

I prefer to fill my carboy up to the very top, however, this doesn’t happen that often. You can top up with boiled and chilled water if it’s a small amount. Minimizing headspace reduces chances of oxidation and is a best practice. Since this is the first racking, I don’t worry about that too much. There will still be some yeast activity which combined with the sulfites should manage oxygen intake for a few weeks. Place a tight fitting hood or airlock and set the carboy in a cool and dry location. Room temperature should be fine and help the yeast finish up fermentation, but cooler can be better if the mead is finished (at the desired FG). If you are trying to stop fermentation, then I would suggest crash cooling to near freezing temperature.

Carboy Transfers
When racking from a carboy, I love the Sterile Siphon Starter from MoreBeer. Always – cleaned and sanitized – then set the racking cane depth and place the hood tightly onto the carboy and blow into the little filter. The mead flows quickly, but again watch for air bubbles around the cane and the hose. At this point, I begin to worry much more about oxidation, so I handle extremely carefully, and will use K-Meta if I feel it is needed.
Normally, I am moving to clear the mead and eliminate yeast in the second racking, so I will often rack onto finings (gelatin, isinglass, SuperKleer). I also store these “racks” at cool temperatures to accelerate clearing and protect the mead flavor.

Why Rack?
There are two real purposes for racking mead. The first is to eliminate the lees, which can break down and release “meaty” flavors. While I have never tasted autolysis in beer, I have in mead; it sucks. The second is to clear, clarify, and stabilize the mead. Once fermented, at least if doing a standard or traditional mead, the yeast are in a inhospitable environment – lots of ethanol and a relatively low pH. Some yeasts allow for extended “sur lie” aging – which can add complexity to a mead. 71B is not a good candidate for this technique.
Even in a reasonably “clear” mead, yeast will continue to sediment in the secondary/tertiary/quaternary carboy. Continual racking after sedimentation forms greatly reduces the amount of yeast that remain viable. Cold temperatures and fining products will accelerate this process, as will filtering. The goal is to have a stable product that will not continue to ferment, go cloudy or sour. Proper sanitation regiments greatly reduce the risks of contamination.
Only you can determine when your mead is ready to package. There are rare circumstances when cloudy or turbid meads are acceptable, so clarity is the first clue. The second is taste. Hot alcohols, yeasty flavors, or lack of integrated flavors (especially with fruit or spiced meads) need additional age and mellowing. The lack of sedimentation over a period of time is also an indication.
Timing
With experience, you can accelerate your finished product. I now seldom rack more than twice, even with big meads. If I control the fermentation properly, I am racking by the second week. If the mead is at my desired gravity, I will rack onto both K-Meta and finings, then cold crash. Usually, within 2-3 weeks, the carboy is ready to transfer to a corny keg, fine and filter. This means I can have a finished product in less than 5 weeks, in most cases. Fruit meads and spiced meads often need more time to fully integrate the flavors – but can be completed if you start with a lower gravity!
Big meads, with OG over 1.100, will generally take a lot longer. I have begun experimenting using ale yeasts, which seem to finish and mature a bit faster than most wine yeasts, but seem less predictable (no experience here yet).
Consider bulk aging your mead. Like wine, most meads benefit from a long cool aging period. The issue is using a vessel that prevents oxidation. I know people that leave their mead in glass or PET carboys for years. I prefer stainless, and a corny keg is a great vessel.

Back Sweetening
Mead is often adjusted or blended like wine before packaging. This process is, in my opinion, where the skill of the mead maker shines. The proper utilization of acids, tannins, or blending stock can turn a good mead into a stellar drink. Since honey varieties are the shining star of traditional meads, your strategy should be to make that honey character pleasing, with a good mouthfeel, and a long finish. Your vectors to manage are sweetness (honey character), acidity (brightens and extends finish), and tannins (affect mouthfeel and finish). Of course, spices or fruit additions, or blending stock can also be leveraged to emphasize desired characteristics.
Back sweetening can be used to increase sweetness or honey character, however, as mentioned, use raw honey carefully. You can also use table sugar (simple syrup) or even corn syrups, but always make sure your mead is stable or risk fermentation restarting. Keep in mind that some syrups will also affect mouthfeel and viscosity. Please do not sweeten your mead to a cloying, tooth ache level.
Honey character is immensely important, and often overlooked in fruit or spice meads. As a mead judge, we expect a quality honey character (not necessarily sweetness) that emphasizes the varietal. With wildflower, this can vary immensely, so pick a characteristic and try to bring it out in a pleasing way. I make a ton of mead with honey from Northern Central Kansas that is nearly 100% alfalfa. The raw honey has an intense cinnamon aroma and flavor, but fermented out, the flavors and aromas become somewhat musty and a touch sour.
Tannins and Acids
The addition of tannins helps to add some body, as well as a slight cleaning astringency. The addition of tartaric acid elevates the aromatics, lengthens the palate and lingering acidity. Because traditionals have so much in common with white wines, esters of pear, apple, peach, or even grape, can be welcome if complimentary. The choice of 71B-1122 in this recipe helps to bring some of those esters to the table, where a Champagne yeast might bring a cleaner finish and fewer esters. How you finish your mead is entirely up to you!
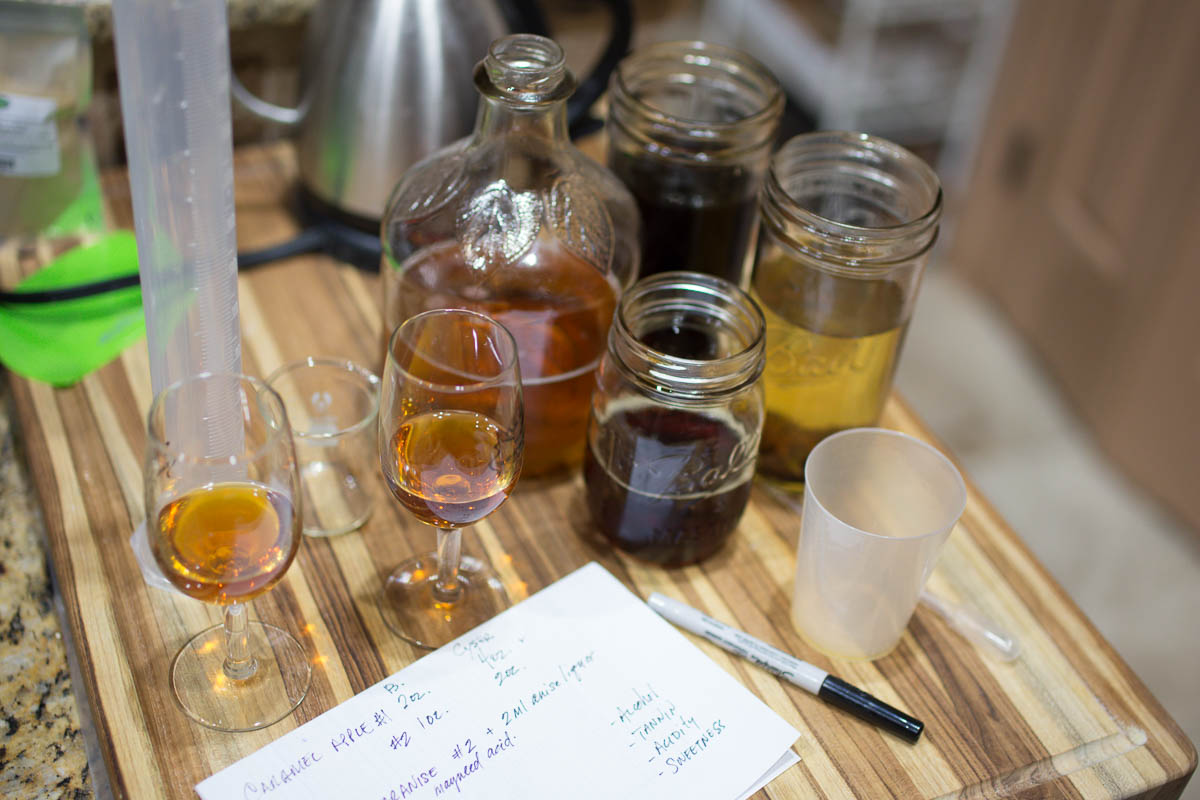
Start with a plan in mind. I like to write down the idea and characteristics I am targeting. For a traditional I skip everything but acid and tannin. If I am preparing a spiced or fruit mead, I think through the spice or fruit character. I have several jars of spices soaking in a dry traditional in the fridge. This gives me a really good idea of how the spice will work, and provides concentrated blending stock. Take notes along the way – and evaluate. Set aside some time, and be aware of how much you are drinking, and how your palate is holding up. Make a small blended batch and set it aside. Some flavors need time to integrate.
Common Finishing Additives:
- Citric Acid – acid derived from citrus. Can enhance citrus flavors. Use carefully.
- Tartaric Acid – acid derived from tartaric crystals from grape wine. Fairly neutral flavor. Great for any mead.
- Malic Acid – common acid found in apples. Very strong and sour flavor. Can enhance cysers, but a little goes a very long way. Be aware, malolactic fermentation reduces malic to lactic.
- Acid Blend – Typically a blend of citric, malic, and tartaric. I am not a fan of blends, but your mileage may vary.
- Phosphoric Acid – A common liquid acid for brewing beer. Can be useful for fine acid adjustments. Too much can taste soda-like.
- Lactic Acid – A common liquid acid for brewing beer. Softer acidity and found in wines that have gone through malolactic fermentation.
- Ascorbic Acid – More commonly used as an anti-oxidant. Somewhat neutral flavor.
- Wine Tannin – Usually in dark powder form, but can be in liquid. Adds body and a slight astringent bite. Will add a little color to pale meads. Can sediment if not properly dissolved.
- Tannin Blanc – A white powdered tannin product preferred for pale colored meads.
- K-Meta/Campden – Potassium Metabisulfite crystals, commonly used as an anti-oxidant. If using Campden, make sure they are potassium based and not sodium.
- Sorbate – Sorbate can be used to help prevent re-fermentation. It blocks yeasts ability to reproduce. It is more effective when deployed with K-Meta and dosed based on pH.

Things to consider: too much (tartaric) acid can create a tart-n-tiny flavor, acid blends are unpredictable (I use either tartaric or malic), too much tannin creates unpleasant astringency, and carbonation (even a little) can increase aromatics and add a welcome bite. This is really a dose and evaluate process. It is helpful if you take a measured approach and standardize so that you can scale a small test to your large batch. Remember, you can always add more – but you can’t remove, only dilute through blending. Use a light hand.
Filtering
Once I started kegging mead, filtering became an option. Make sure to fine your mead first in the carboy for clarity. I use a standard 10″ filter housing with a reusable 0.45u absolute PES cartridge. I prepare by running StarSan through the filter, then connect to the source keg and push mead through until I have clear mead running. Then I connect to a CO2 purged receiving keg. Make sure your flow direction is correct and push into the keg. Use a low PSI. If the mead stops to flow, you can raise the press to as much as 8-10 PSI. If you filter really cloudy mead, you may need to stop, clean the filter, sterilize it again, and restart the filtration process.
Filtering WILL remove some color and flavor, but I haven’t found it to be substantial, even with richly unctuous fruit meads. You can account for this with your recipe. I also make adjustments to tannin and acidity after filtering so I am working from a finished product perspective.
After filtering, back flush the filter and housing with clean water and finish with StarSan. If the filter is really messy, you can boil it with a little StarSan to remove the built up detritus and yeast. I will gently brush with a clean toothbrush, then vacuum seal the sanitized filter and store it cold. I can get 12-15 uses out of a PES cartridge.

Packaging
I will admit, I get lazy about this. I keg. Most of my mead sits in corny kegs until I want to send to a competition or share, with just enough pressure to seal the lid. Occasionally I forget to reset the CO2 pressure and my mead carbonates. Carbonated mead can be really wonderful, but usually by the time it is bottled, it is merely petillent. Sparkling levels of carbonation are nice, but really require counter pressure filling techniques. I also make minor acid/tannin adjustments when bottling. Even after filtering, the flavors can morph or change with conditioning. Of course, it is handy to have mead on tap – just remember that your lines may get discolored or funky with spiced or fruit meads sitting in them.
I have never bottle conditioned a mead, as I don’t want lees or cloudy mead, but I know it can be done. For competition, I fill in the usually 12 ounce brown bottles with a crown. For gifts, I choose punted wine bottles (just in case of refermentation) and corks. Anything unusual is welcome as well – and a deep purple blackberry mead looks beautiful in tall whisky bottles. Of course, consider making a complimentary label.
Hopefully, your first mead come out incredibly tasty! Cheers!


Hi, I’m a cidermaker and came across your article and enjoyed it.
You may be interested to know that malolactic fermentation does indeed turn malic acid to lactic acid -however synthetic malic acid unlike natural has left and right handed isomers only one of which can be metabolised by the bacteria.
Hi Matt, I’ve enjoyed reading this website getting ready to make my first mead. I just racked it off for the first racking and the ABV is 11.30 at this time. I’m making it for a wedding in May for my brother and his fiance. My question is, should I be adding malice acid, tartaric acid, and tannin? I added all of these ingredients when I first started the fermentation. I tasted the mead when I took a hydrometer reading and tasted really Good! I’m a newbie so any help would be appreciated. I did read the above info, but not sure about amounts or if I should even add any. I know I will have to add forbade to stop any fermentation because I would like to bottle sometime in March. Thanks , Jerry
Hi Jerry, thanks for the nice comment. You don’t give me enough info to really give specific advice. However, here is some more general. (1) Congrats on your first mead. I hope you used a staggered nutrient addition approach. Generally, this avoids MOST of the really bad off-flavors. (2) I would not add any acids up front – regardless of the recipe. The yeast do the work to reduce pH and this brings a little yeast ester profile to the mead and may prevent a stall because pH may fall and cause a stalled fermentation. (3) If you are happy with the flavor profile, march onward. I would still suggest a mini-bench trial with some tartaric acid (which I prefer) to see how that acid may open up the mead. (4) Sorbates + Metabisulfites do not stop fermentation but slow it. Along with cold crashing, they prevent yeast from budding, increase free SO2, and ensure no O2 available to spoilage bacterium.
You have a long road to March. Make sure to minimize any headspace in bulk conditioning. Personally, I’d likely get this bottled soon and let the bottles set until you need them.
Your brother is a lucky dude!
Thanks for your quick response!
Hi I recently just made my own first batch started out very well and in the 5 gallon bucket I racked after three weeks to a gallon glass jug where I had it sitting for about three months. But when I thought it was done fermenting there were still a small ring of bubbles forming around the outside and a big group of them in the center that slowly kept forming and popping. just before my wrist surgery I decided to rack it into a clean gallon jug after sitting for three months by itself too get rid of sediment. Now there is no activity whatsoever after being some right before that and it is still very sweet did I do something I shouldn’t have?
Hi Randy, there’s not enough information to really help diagnose. It is important to use a hydrometer to determine when fermentation is finished. It is possible that additional gas is just escaping and creating that little ring, and that fermentation is complete. It is also possible that either you used too much honey upfront or that something happened to stall your yeast. I would suggest making a dry mead now, using staggered nutrient additions, and blend back with this current mead to reduce the sweetness.
Thank you for all this useful information – racking and clarifying my first mead today 🙂